by Jan Dunn, MS
Aloha everyone!
A couple weeks ago we posted Dancers: Let’s Talk “Core Control” – Part 1, and I promised you a second part with some specific suggestions on exercises, to help you work on this important aspect of your dancing and everyday lives. Most of what I want to share in this (and the next) segment are exercises you would do outside of class (although if you’re a teacher, you can work them into the class you teach, as I’ve always done), along with the alignment tips and cues I’ve already given you – plus a few more here!
FYI, much of what I’m sharing in this segment I learned over the years working in physical therapy clinics, as well as in the Pilates world – plus a few that I came up with myself!
Special thanks to my “two Sarahs” – Sarah Carrasco, my Pilates colleague and former Broadway gypsy, who did the modeling, and Sarah Graham, PT, from Denver Dance Medicine Associates, who provided input on the medical / research pieces.
Neutral pelvis (NP) / Neutral spine (NS) – Sitting / Standing
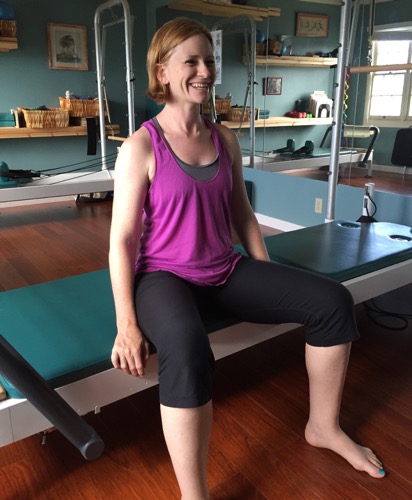
I gave you the image / cue of the pelvis / rib cage / head balanced one on top of another, and the “sternum (breastbone) to pubic bone” cue. An easy way to make sure these ideas make sense before you stand up is to sit on a firm seat (not a cushy couch), feet flat on the floor. Sit firmly on your two “sit-bones” (ischial tuberosities in anatomical language). If you are firmly grounded on those two bony points, you are in a neutral pelvis.
Another way to find sitting NP, is to sit tall and slowly rock in between arching your back (lumbar spine hyperextension) and slouching forward (flexion in the lumbar spine) — and stop somewhere in the middle, where there is a moderate natural curve in the low back.
Suggested images to think of here could be:
- Your pelvis is a full bowl of water that doesn’t tilt / splash either forward (meaning you would be arching your back – “swayback”) or backward (meaning you would be slouching).
- Put a finger on your two hip bones in front (your ASIS – anterior superior iliac spine) and your pubic bone. Those 3 bony points should form a triangle that is perpendicular to the floor, with the public bone pointing straight down.
Once you feel firmly anchored on those sit-bones, use some images that lengthen your spine upwards. Some of my favorites are:
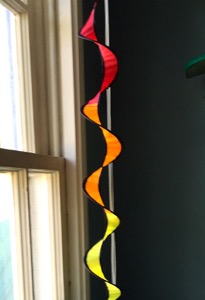
A spiral of energy going upward
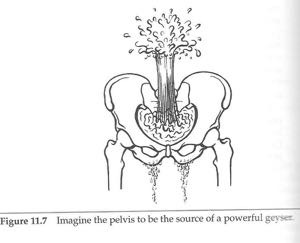
A water fountain from the base of the pelvis, going up and out the top of the head.
The Eric Franklin drawing of the “bobble boy”, that I used in Part 1
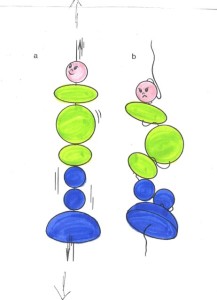
A magnet on the top of the head reaching up to a magnet on the ceiling (that particular one seems to appeal more to men – more mechanical, I guess!).
And last but not least, that image we used in Part 1, of the sternum directly vertical with the pubic bone. That applies to sitting as well as standing!
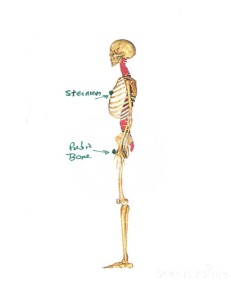 Once you have gone through those various cues sitting, you can apply the same images / thoughts to standing. All of those are going to help kick in the back stabilization muscles that we’ve been discussing
One last important thing to remember when sitting – most couches / chairs / car seats almost force you to “slouch”, to rock the pelvis under. Can you see where that compresses the discs and vertebrae in your lumbar spine (low back)? Always try to sit so that you can really be upright, in a NS.
Neutral pelvis (NP) / Neutral spine (NS) – Supine (on your back)
OK, so we’ve got NP / NS sitting and standing. Let’s now talk about lying down (supine – meaning on your back, in medical /anatomical terms)….because most of the exercises I’m discussing here are done in a lying down position. That’s because when you’re upright, gravity is pulling on you and you are more likely to go into your old / maybe-not-so-healthy-alignment patterns. When we lie down to do this kind of “neuromuscular repatterning” (because that’s what it is), to introduce new concepts into our body, it takes us out of our normal relationship with gravity and makes it easier for these new patterns to get started. Make sense?
Many times people say, when they are lying down, “how do I know for sure if I’m in NP or not?”. You would be surprised at how even dancers don’t quite get this when first lying down / trying to find a NP! They are almost always flattening their back unconsciously.
I use a physical therapy trick that I was taught long ago, working in Pilates rehab programs in PT environments. It’ called “the Plop”. Seriously! That’s what the PT’s I worked with called it, and I still use the term. It works like this:
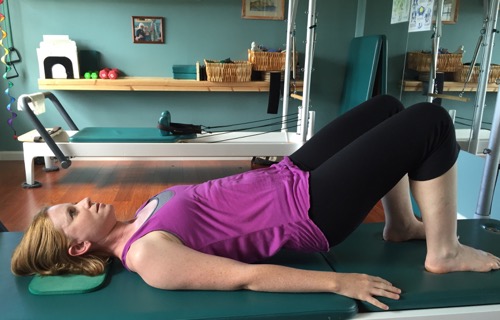
Lying down, with your legs bent / feet on the floor, lift your hips just slightly off the floor – like this:
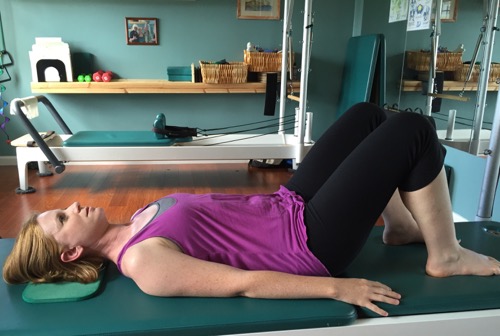
Drop your hips down. Don’t carefully place them down, literally let them “plop” (but never do that if it causes pain in the lumbar spine).
The plop gets you into your own neutral pelvis–it allows muscular holding patterns (like unconsciously wanting to flatten your back) to release for just a few seconds, before those patterns might want to take over again. Think of the plop as your “set point” or “home base” – i.e, “Am I in neutral? I’ll plop and see”.
Another way to get into NP lying down is to slowly rock your pelvis back and forth, from an arched back to a flat back, and then find the place in the middle where you have a natural lumbar curve.
As soon as you do find a neutral pelvis, whether you use the Plop or the rocking method–notice immediately how much pressure is on your sacrum (the broad flat part of your lower back). If you stay in NP, that pressure should stay the same – i.e., if you either arch or flatten your back, it will change.
Your “pelvic triangle” that we talked about earlier, in sitting / standing, is now parallel with the floor / ceiling, with the pubic bone neither pointed up or down.
You can use the water bowl image as well, only this time the water bowl is resting on your belly, and completely level / not spilling either way.
An image I learned recently that I had never heard, and I love, is to imagine a plate on your belly with a marble in the center–and the marble can’t move. That image really refines working in neutral, at least for me. That comes courtesy of my Pilates / dancer colleague here on Kauai, Sarah Carrasco, the model for our photos!
Breath
We haven’t really talked about breath, and as with many of these topics, it’s one that could have an article all to itself–but for now, let’s just go over a few important points:
When we take a breath, we want a full expansion of our rib cage, not only to the front, but also to the sides and back. Many of us are “frontal breathers”, not really expanding the rib cage in all directions. That’s not healthy, because:
- Where each rib meets the spinal vertebrae, in back, is a joint, and joints are designed to move – to remain healthy and avoid arthritis as we get older. A breathing pattern that only expands to the front, not to the sides and back as well, does not involve much movement at that joint – so we want to fully expand our rib cage each time we take a breath.
- In-between each rib are small muscles called the intercostals, and like all muscles, they are designed to move – but with a rib cage that is more “held”, not moving much except to the front, they don’t move a lot. Again, not a good thing.
- And last but not least, if the rib cage is expanding in all directions, as it is designed to, we can more easily access that important abdominal muscle, the TA (transverse abdominus).
So for all those reasons, learning to fully expand the ribs is really good for you. I’ve met many dancers who do great with that, but others who don’t. Here are a couple imagery cues to think of:
imagine that your ribs on the sides and back are beautiful sails on a sailboat, and with each breath they are billowing outward.
- Imagine that your lungs are balloons that are expanding in all directions with each breath. (Make the balloons colored or with beautiful patterns if that works better for you.)
- Use a theraband to help get the idea of a full ribcage breath. Tie it around your chest, and with every breath, feel the ribs expanding side and back.
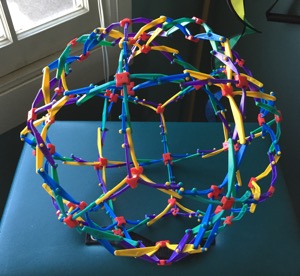
I often use a toy to demonstrate full use of the breath / rib cage – it starts out compact and small, and then it expands wide in all directions (just as your rib cage should).
OK! In the interest of keeping things to a reasonable length, we’re going to stop here for today and pick things up tomorrow with specific core exercises. Don’t miss our Part III then!

Editor Jan Dunn is a dance medicine specialist currently based on the island of Kauai, Hawaii, where she is owner of Pilates Plus Kauai Wellness Center and co-founder of Kauai Dance Medicine. She is also a Pilates rehabilitation specialist and Franklin Educator. A lifelong dancer / choreographer, she spent many years as university dance faculty, most recently as Adjunct Faculty, University of Colorado Dept. of Theatre and Dance. Her 28 year background in dance medicine includes 23 years with the International Association of Dance Medicine and Science (IADMS) – as Board member / President / Executive Director – founding Denver Dance Medicine Associates, and establishing two university Dance Wellness Programs
Jan served as organizer and Co-Chair, International Dance Medicine Conference, Taiwan 2004, and was founding chair of the National Dance Association’s (USA) Committee on Dance Science and Medicine, 1989-1993. She originated The Dance Medicine/Science Resource Guide; and was co-founder of the Journal of Dance Medicine & Science. She has taught dance medicine, Pilates, and Franklin workshops for medical / dance and academic institutions in the USA / Europe / Middle East / and Asia, authored numerous articles in the field, and presented at many national and international conferences.
Ms. Dunn writes about dance wellness for 4dancers and also brings in voices from the dance wellness/dance medicine field to share their expertise with readers.


